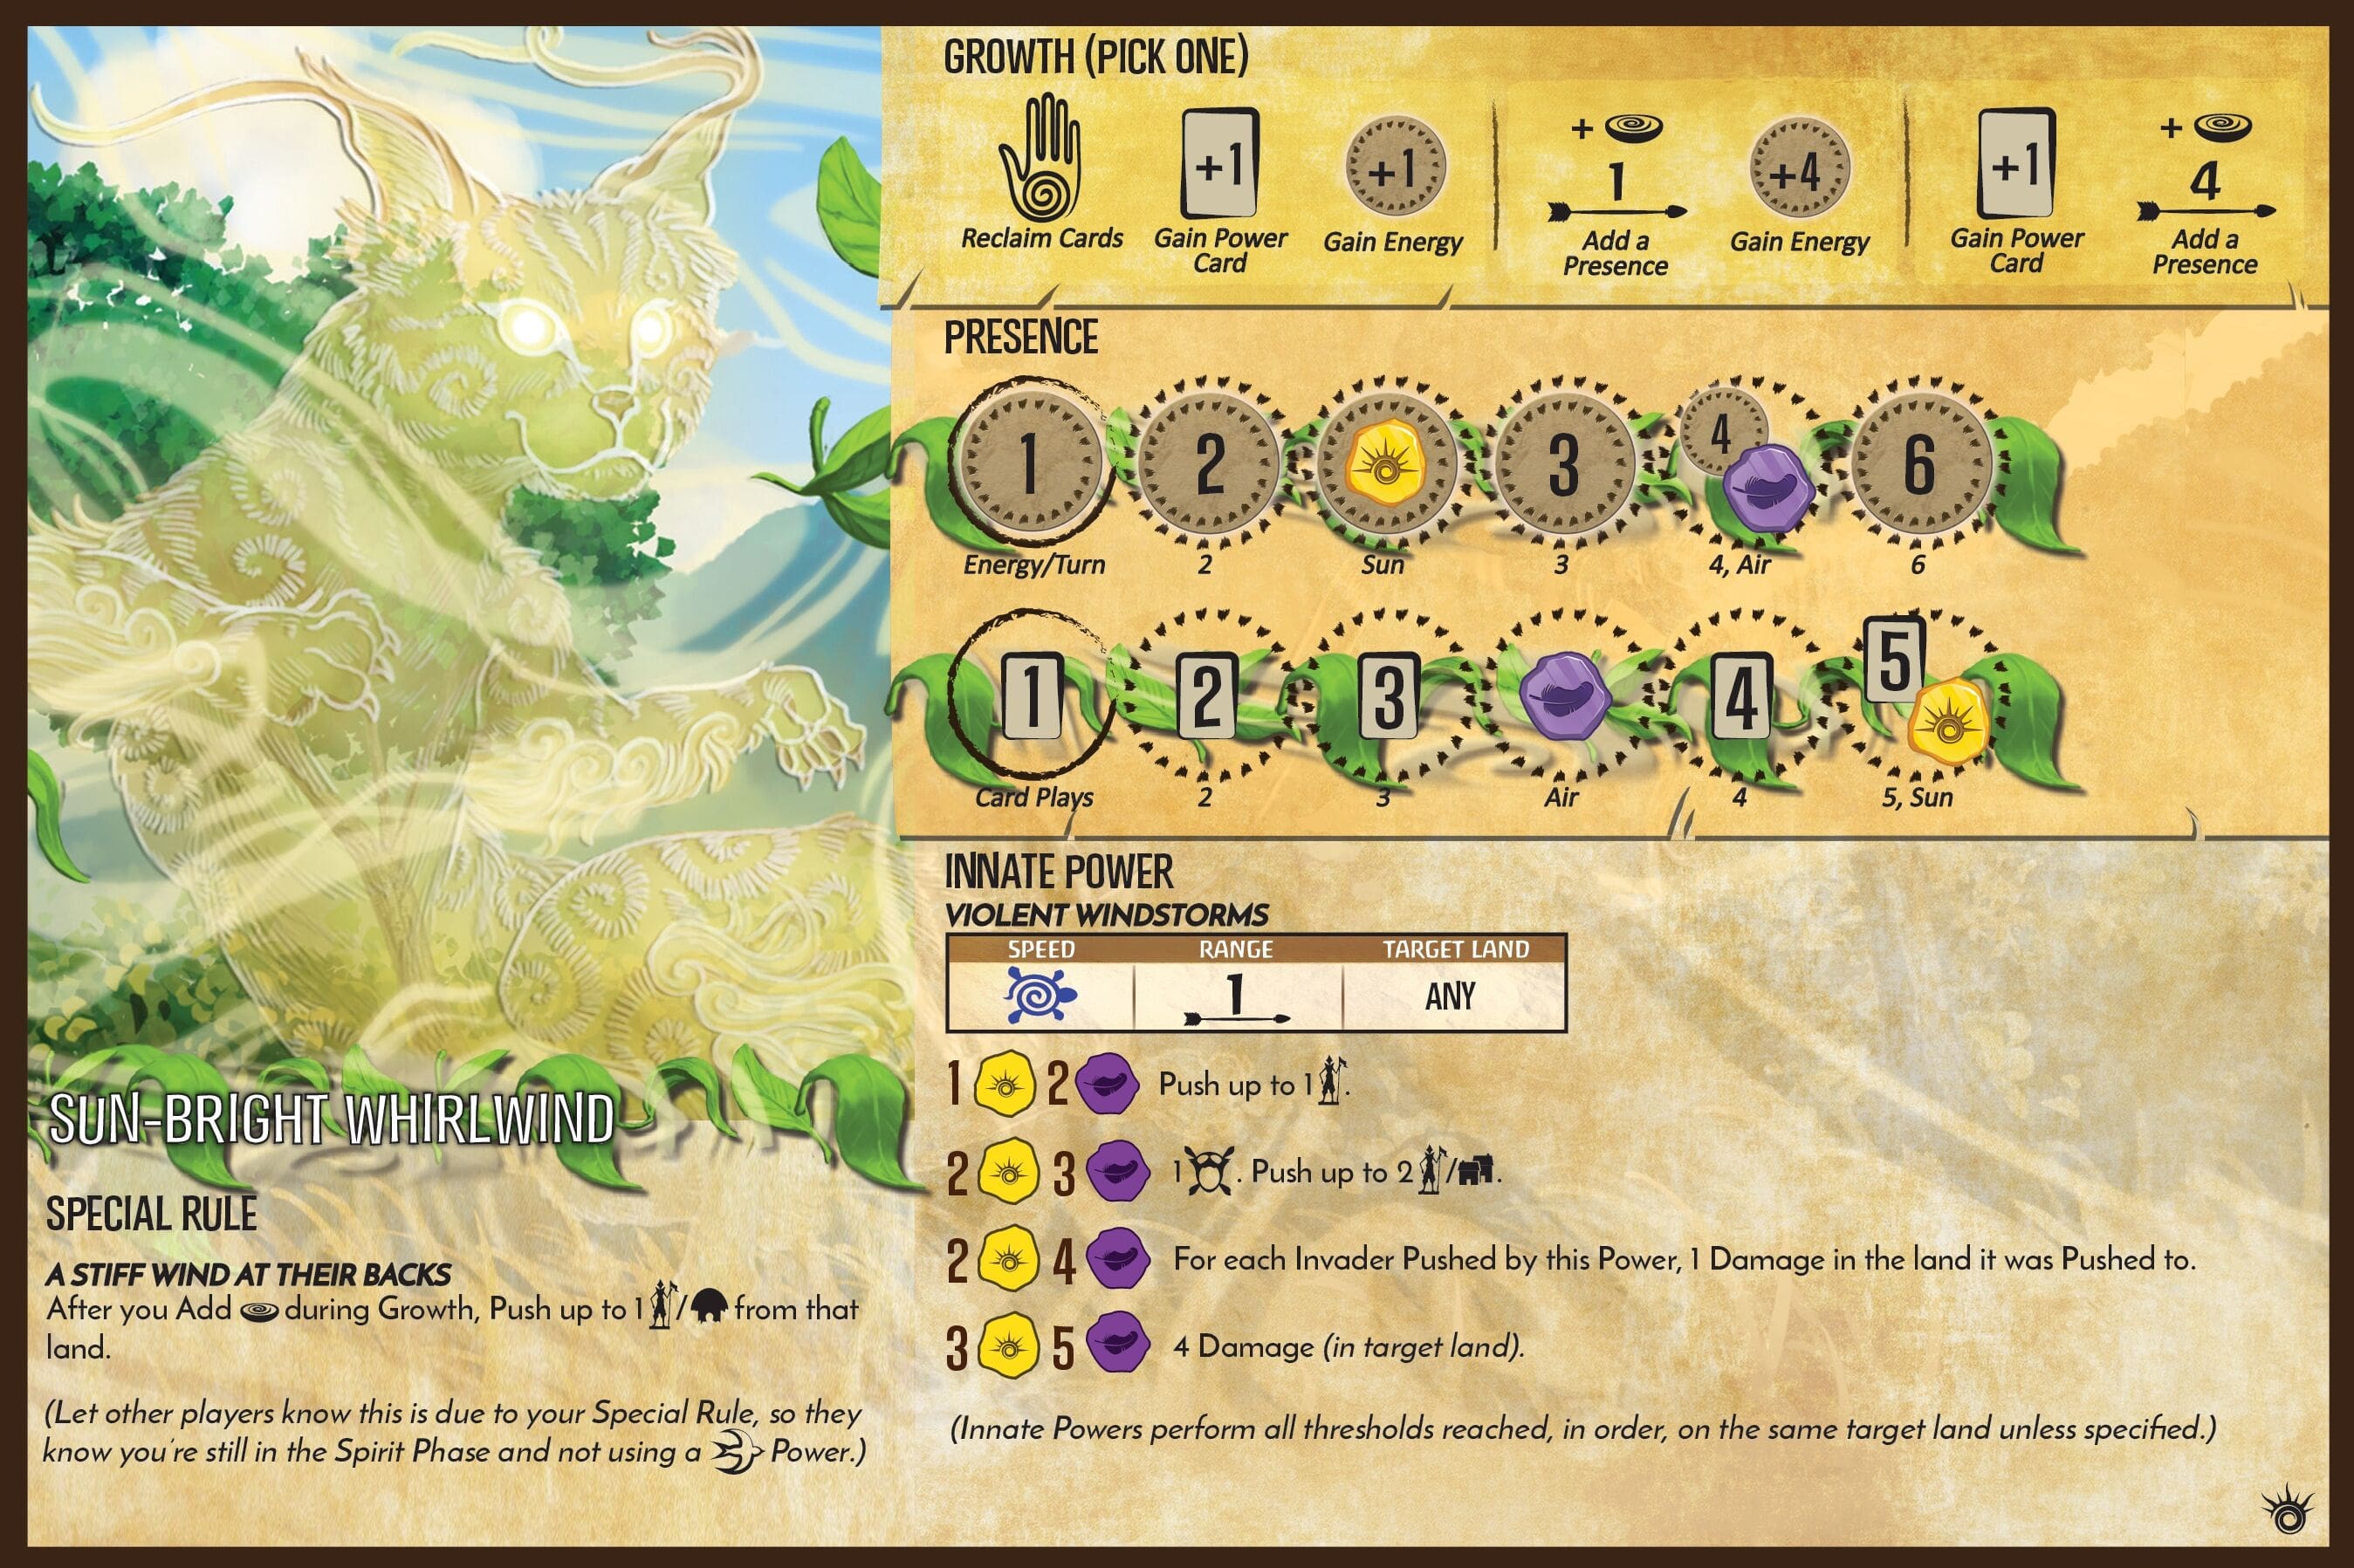
Nickname: Whirlwind, Sun-Bright
Release: Horizons
Elements: 

Guides
Whirlwind - Standard
Topic - Sun-Bright Whirlwind
Intro
Whirlwind’s special rule pushing explorers and preventing builds is a very effective action you should make use of every turn. In this strategy, we lean on it a bit for turns 3 and 4 as we underplay and build up to a big turn 5 with plenty of cards to keep hitting innates from then onwards.
Opening
Link to original
- G3 Bot Minor, get cheapest with
(or cheapest useful effect if no air) > Gift of Sunlit+ Minor
- G2 Bot > Gift of Wind + Scatter + Tempest
- Reclaim, minor > 2 cards
- Start planning ahead for turn 5: You will need to save 2
and 3
- G3 Bot, minor > 2 cards
- G2/G3 Bot > All remaining cards
- If you have enough energy to play all the cards in your hand, go for a G3 to try and hit the tier 4 innate. Otherwise G2 so you can play everything
- Reclaim, play as appropriate
Unique Cards
| Rating | Elements | Name | Notes |
|---|---|---|---|
| A |  | Gift Of The Sunlit Air | |
| A |  | Gift Of Wind-Sped Steps | |
| A |  | Scatter To The Winds | |
| A |  | Tempest Of Leaves And Branches |
Play Patterns
Combo Gift of Wind-Sped Steps with your innate or Scatter to the Winds to move around a lot of things at fast speed.
Drafting
Minor Draft Priorities - Energy is almost always tight! You need about twice as much air as you do sun.
- Draft the cheapest card you can that has . A card with is a great find, but think carefully about the trade-off if it will involve paying an additional energy for that .
- If no cards have , get the cheapest useful card you can.
Draft-able Minors:
- 0-cost
- 6 with both
- 9 with only
- 6 with both
- 1-cost
- 6 with both
- 17 with only
- 6 with both
Draft Chances:
- Any minor with : ~90%
- Any 0-cost with : ~50%
- Any minor with : ~40%
- Any 0-cost with : ~20%
Boards
Because you are often using your presence placement to disrupt invaders, you will likely find yourself without many sacred sites.
- The “best” starting boards are those with full coverage if you finish your high-sands sacred site or make a second site elsewhere from scratch.
- The “good” boards are those with solid initial adjacency but require finishing the high-sands site and creating a third one from scratch at some point, typically only having 1 land outside it’s coverage.
- The “avoidable” boards are those with poor initial adjacencies you could get coverage with get a better rating than boards that would need you to make one from scratch (which is unlikely due to explore frequency), and those still are rated higher than boards requiring you to make 3 sacred sites for total coverage.
Total coverage is not strictly necessary, however you will find that starting in a land with many adjacencies, and having likely sacred site coverage after Stage 1 explores will make the game smoother.
| Priority | Board | Reason |
|---|---|---|
| 1 | E | Fast sacred site |
| 2 | C | "" |
| 3 | H | "" |
| 4 | F | Slow sacred site in L1 or L5 |
| 5 | D | 5 adjacent, missing L3 after fast sacred site |
| 6 | A | 4 adjacent, missing L3 after fast sacred site |
| 7 | B | 3 adjacent, missing L8 after fast sacred site |
| 8 | G | 2 adjacent, missing L3 after fast sacred site |
Spirit Friends
- Volcano - feed volcano
- Ocean - feed ocean
Can grant range and a conditional fast→slow with it’s gifts.
Credits
- ACupOfMeck - Google Drive